
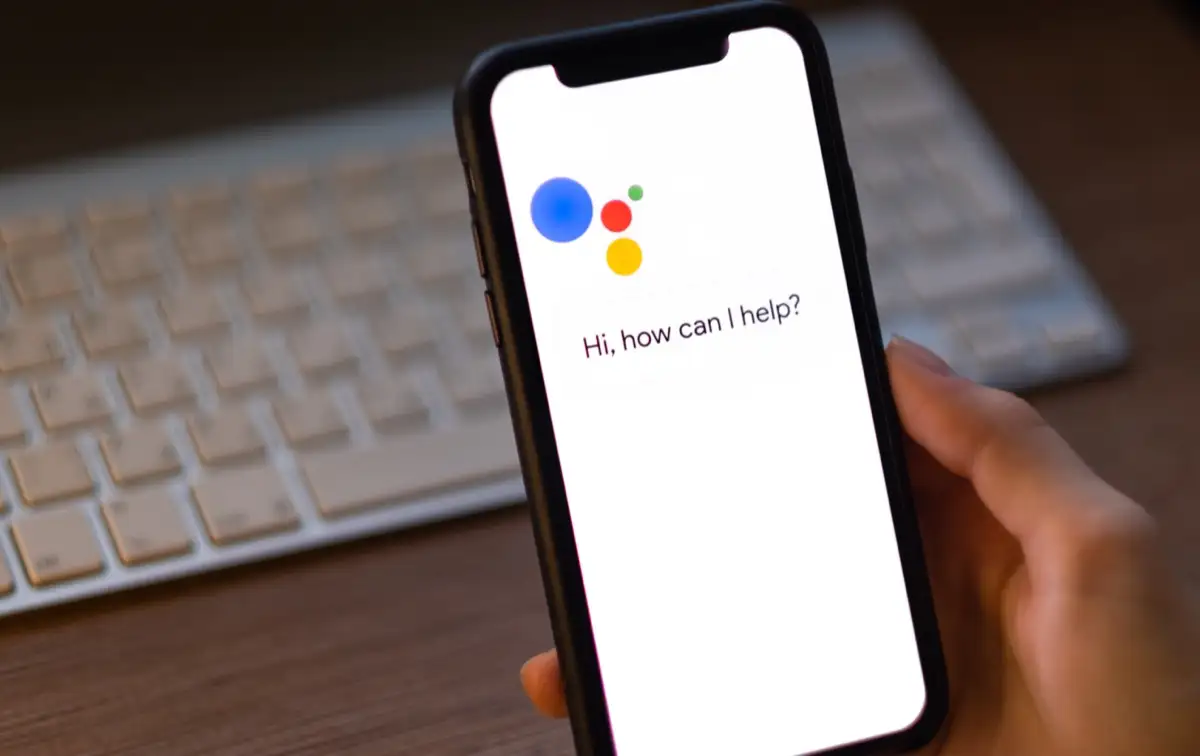
Google 어시스턴트가 작동하지 않습니까? 시도해야 할 13가지
게시 됨: 2022-06-18"Ok Google"이라고 말하면 Google 어시스턴트가 작동하지 않습니까? 불행히도 Google 어시스턴트의 작동을 멈출 수 있는 많은 것들이 있습니다.
이 기사에서는 Google 어시스턴트가 다시 작동할 가능성이 가장 큰 13가지 수정 사항을 다룹니다. 가장 간단한 수정 사항부터 시작하여 보다 심층적인 솔루션으로 작업할 것이므로 맨 위에서 시작하여 아래로 진행합니다.
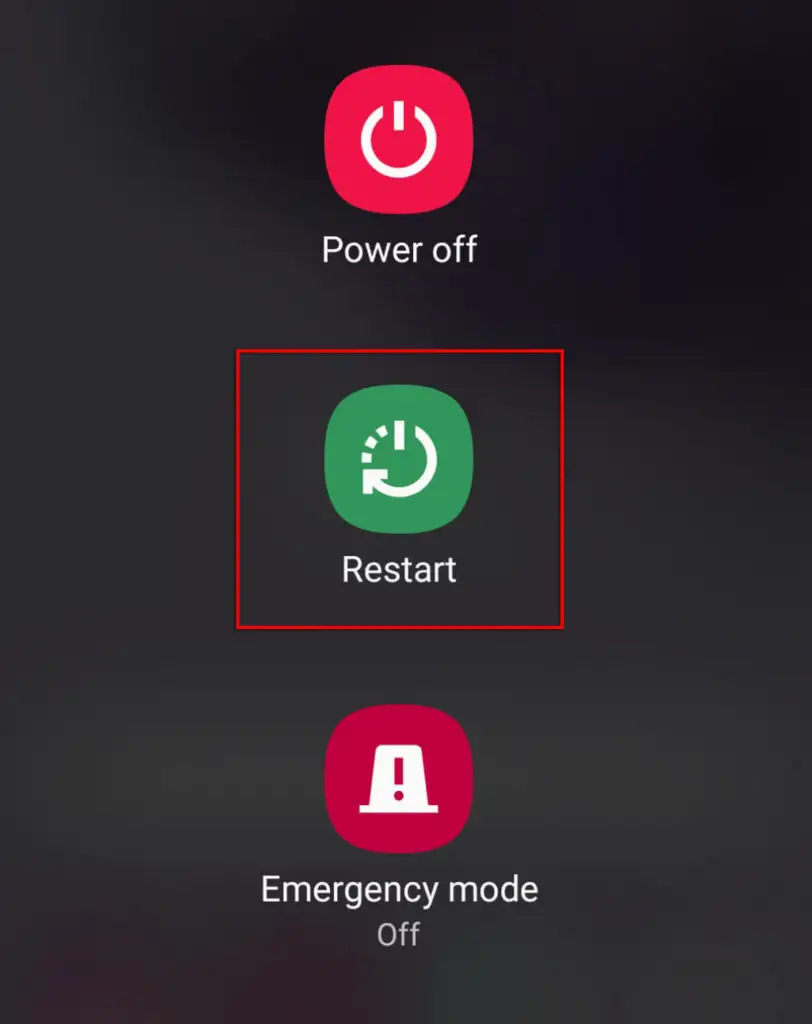
1. 장치 다시 시작
가장 일반적인 기술 조언은 "껐다가 다시 켜십시오"입니다. 경우에 따라 기본 재부팅으로 오류가 지워지고 Google 어시스턴트가 다시 작동할 수 있습니다. Android 기기를 다시 시작하려면 전원 버튼을 최대 10초 동안 누르고 있다가 다시 시작을 탭합니다.
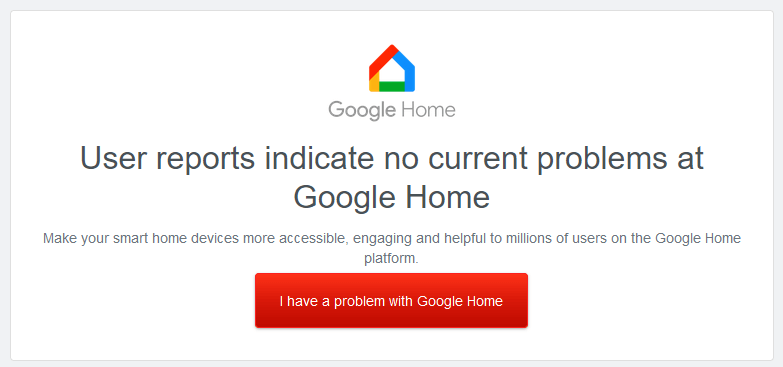
2. Google 서비스가 다운되었는지 확인
드물긴 하지만 Google 또는 Google Home 서비스가 다운될 수 있습니다. 이 경우 서비스가 다시 활성화될 때까지 기다릴 수 밖에 없습니다.
Google 서비스가 다운되었는지 확인하려면 Google 및 Google Home의 DownDetector 페이지를 확인하세요. 트위터와 같은 공식 Google 소셜 미디어 페이지에서 실시간 상태에 대한 최신 업데이트를 확인할 수도 있습니다.
3. 기기가 Google 어시스턴트를 지원하는지 확인
많은 구형 Android 휴대전화가 Google 어시스턴트를 지원하지 않으므로 휴대기기가 호환되는지 다시 확인하세요.
Google 어시스턴트의 호환성 요구사항:
- 메모리가 1GB 이상인 Android 버전 5.0 또는 메모리가 1.5GB 이상인 버전 6.0 이상
- Google 앱 버전 6.13 이상
- 화면 해상도는 720p 이상이어야 합니다.
- Google 어시스턴트는 기기 언어를 지원해야 합니다(Google 지원 언어 참조).
4. 인터넷 연결 확인
Google 어시스턴트가 작동하려면 인터넷 연결이 필요합니다. 즉, 장치가 작동하려면 Wi-Fi 네트워크 또는 모바일 데이터에 연결해야 합니다.
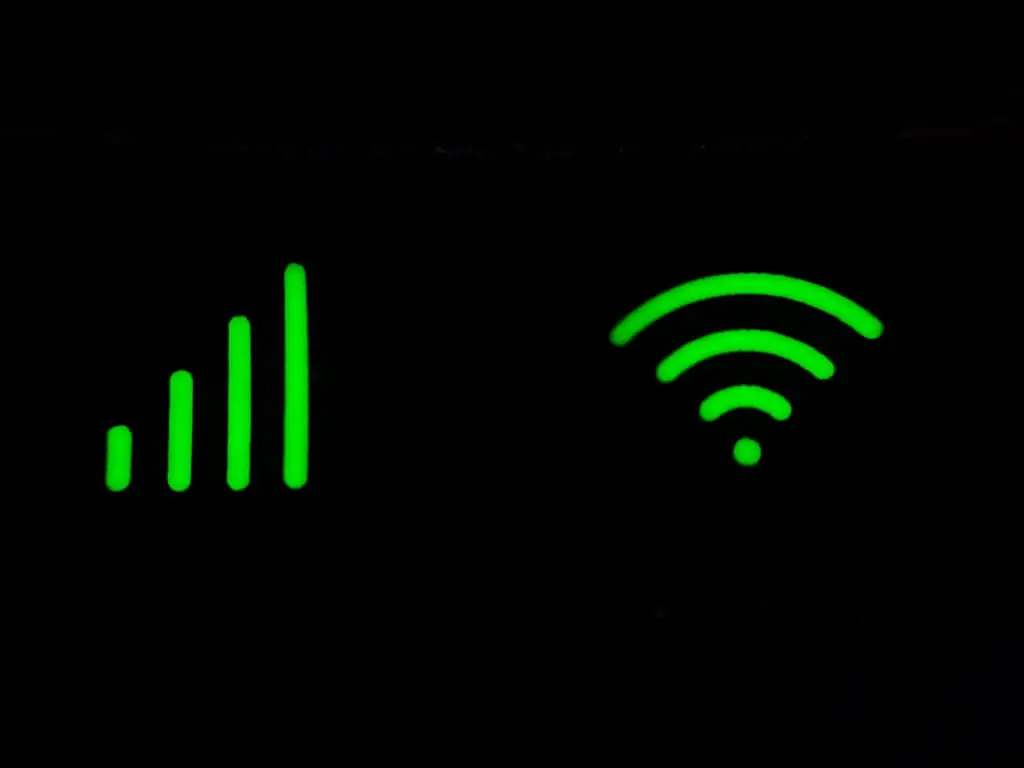
인터넷을 확인하려면 웹 브라우저 앱을 열고 페이지를 로드해 보십시오. 로드되지 않으면 인터넷 연결 문제를 해결해야 합니다.
참고: VPN 서비스를 사용하는 경우 잠시 연결을 끊고 Google 어시스턴트가 작동하는지 확인하세요. Google 어시스턴트가 작동하려면 인터넷이 필요하기 때문에 때때로 VPN이 기능에 문제를 일으킬 수 있습니다.
5. 마이크 확인
명백하지만 종종 간과되는 문제는 마이크가 비활성화되거나 작동을 멈춘다는 것입니다. 마이크가 없으면 Google 어시스턴트가 분명히 음성 명령을 들을 수 없습니다.
이를 확인하려면 누군가에게 전화를 걸거나 자신이 말하는 동영상을 녹화해 보세요. 소리가 녹음되지 않으면 마이크에 문제가 있을 수 있습니다.
이 경우 스스로 고칠 수 있을 것 같지 않으며 수리를 위해 제조업체에 다시 보내는 것을 고려해야 할 수도 있습니다.
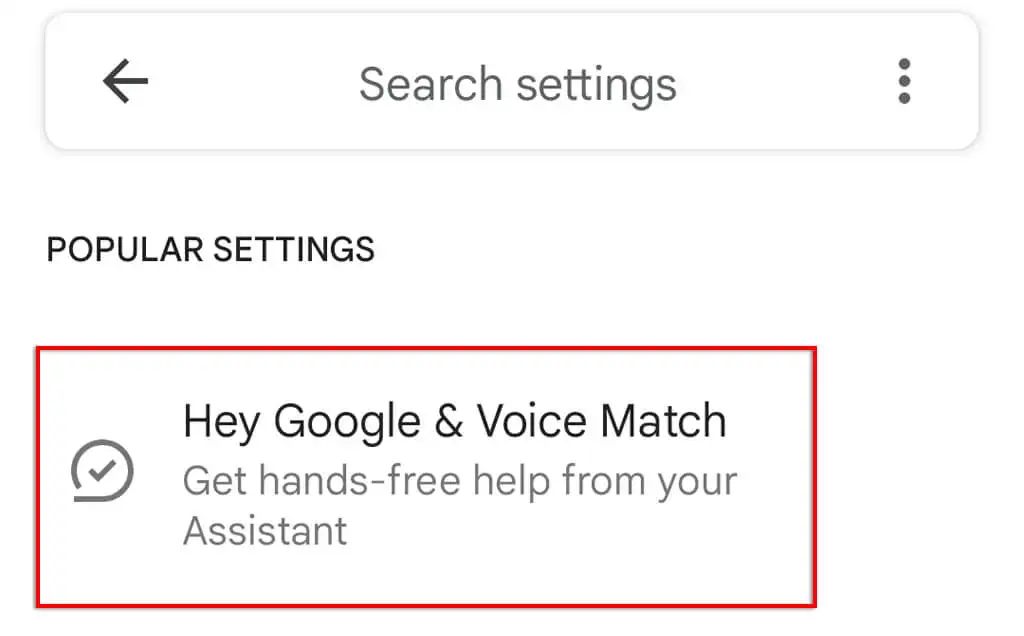
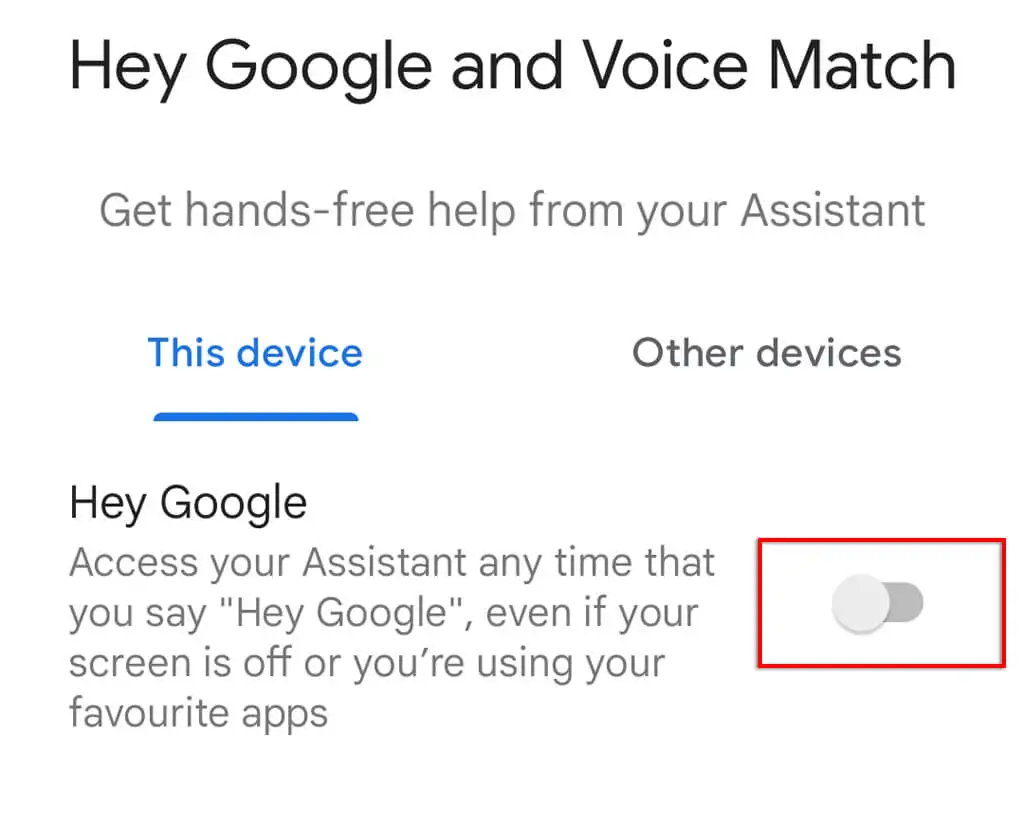
6. 구글 어시스턴트 활성화
Google 어시스턴트 문제의 일반적인 원인은 기기 설정에서 실수로 비활성화되었기 때문입니다. Google 어시스턴트를 다시 활성화하려면 다음 단계를 따르세요.
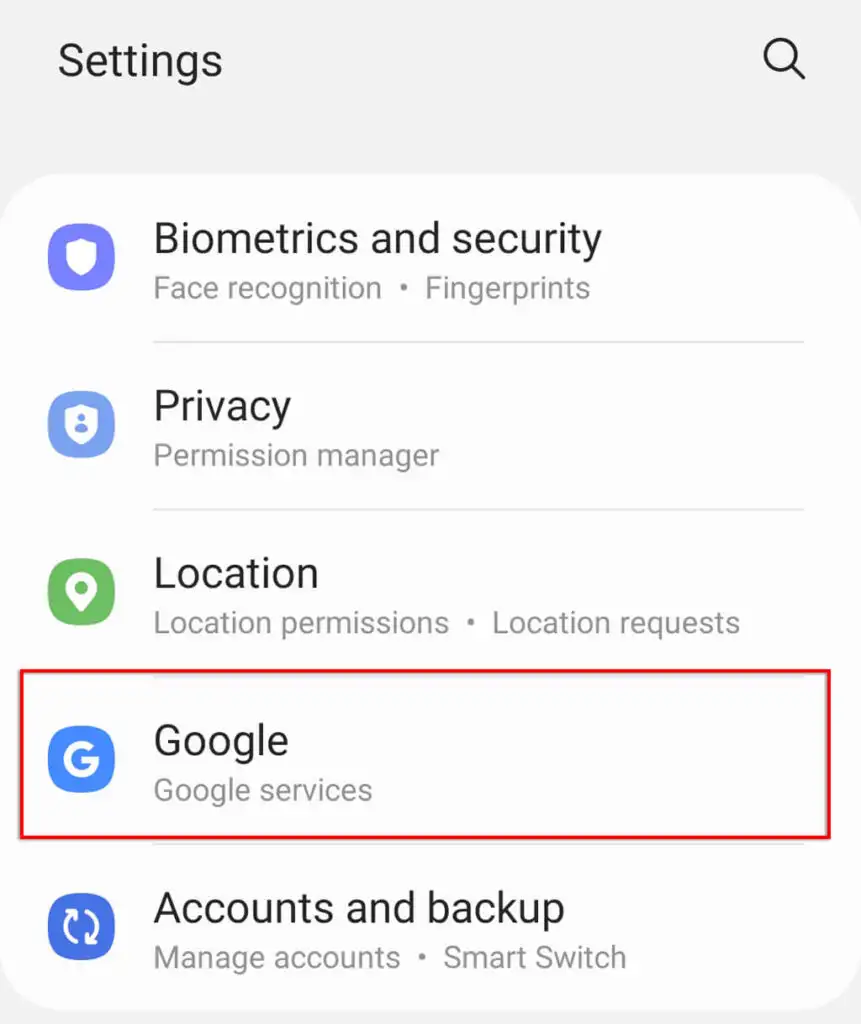
- 설정 을 엽니다.
- Google 을 탭합니다.
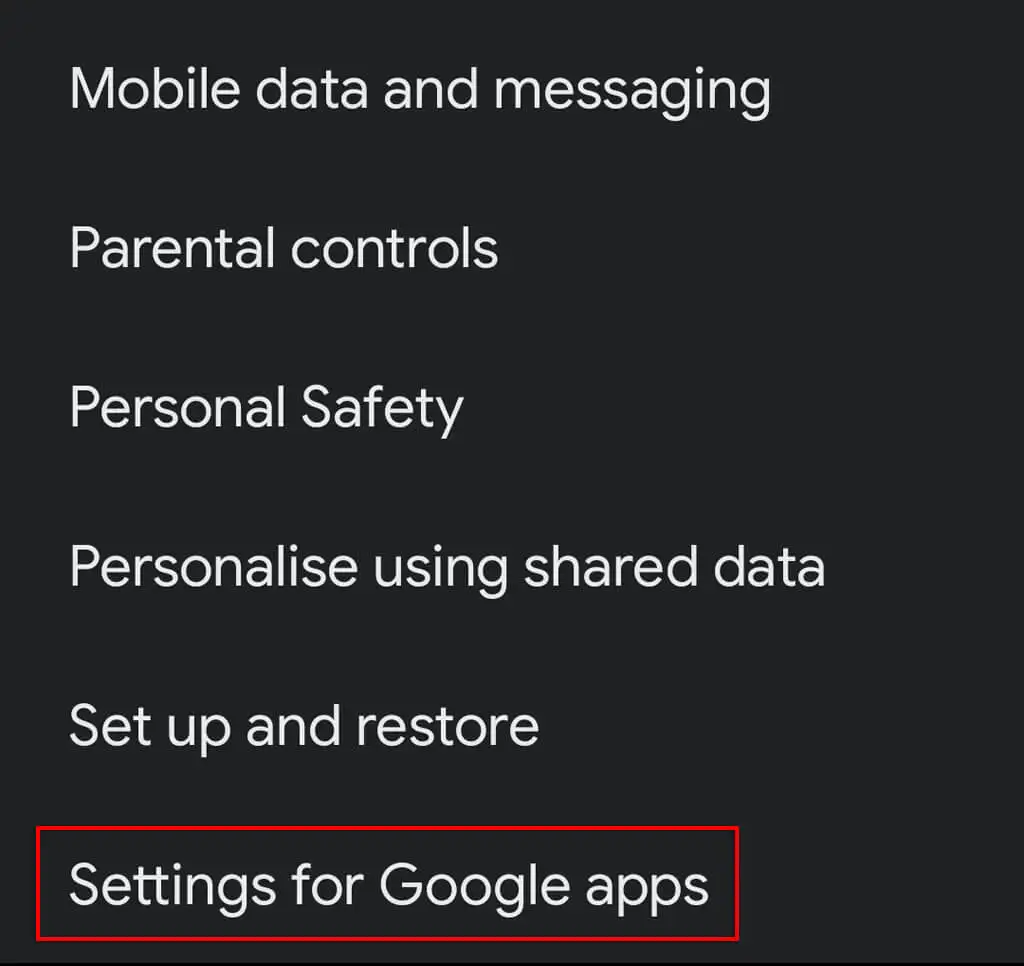
- Google 앱 설정을 탭합니다.
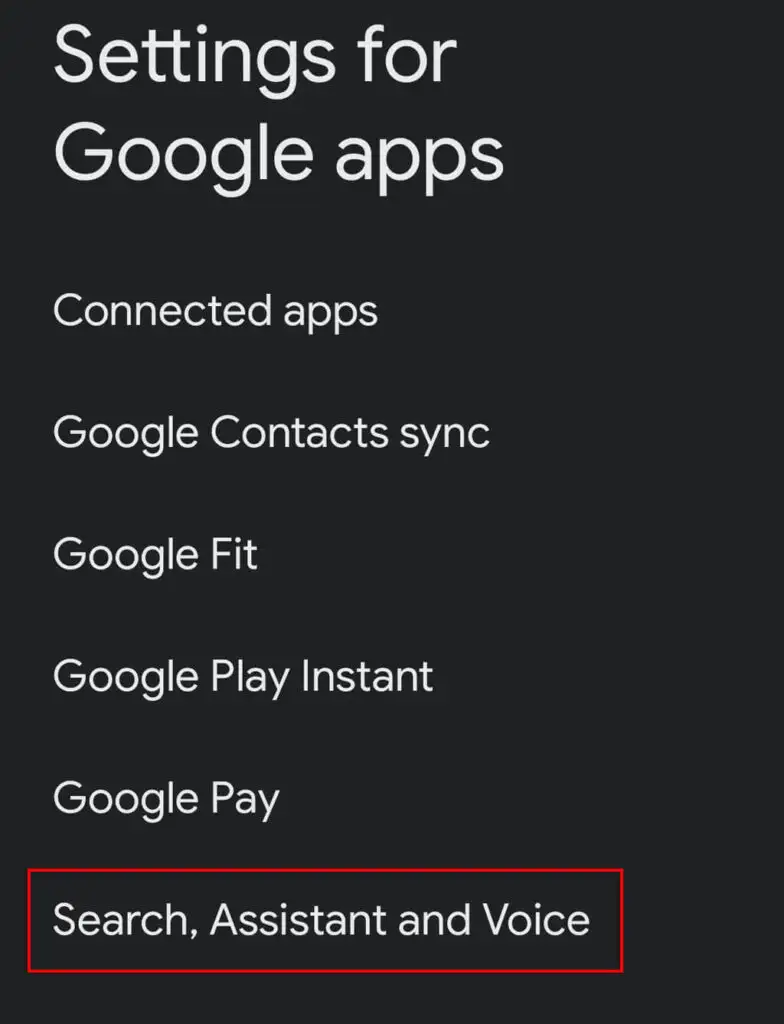
- 검색, 어시스턴트 및 음성을 선택합니다.
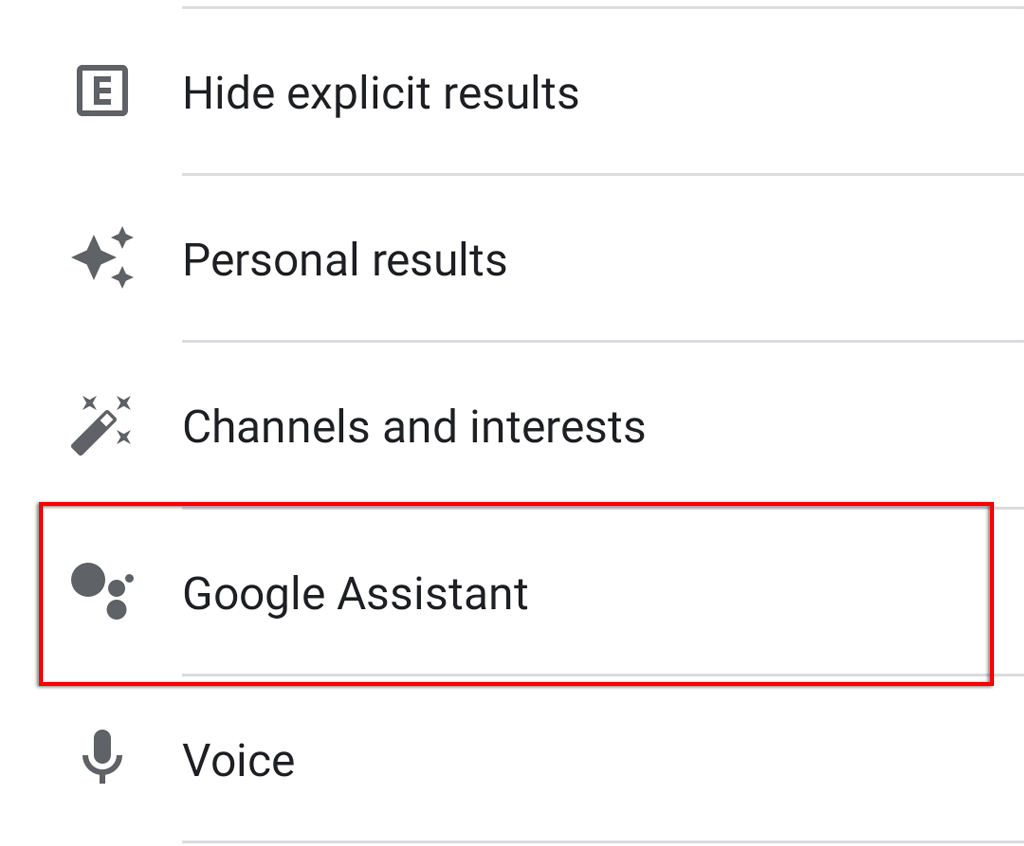
- Google 어시스턴트 를 탭합니다.
- Hey Google 및 Voice Match 를 탭합니다.
- Hey Google 을 켭니다.
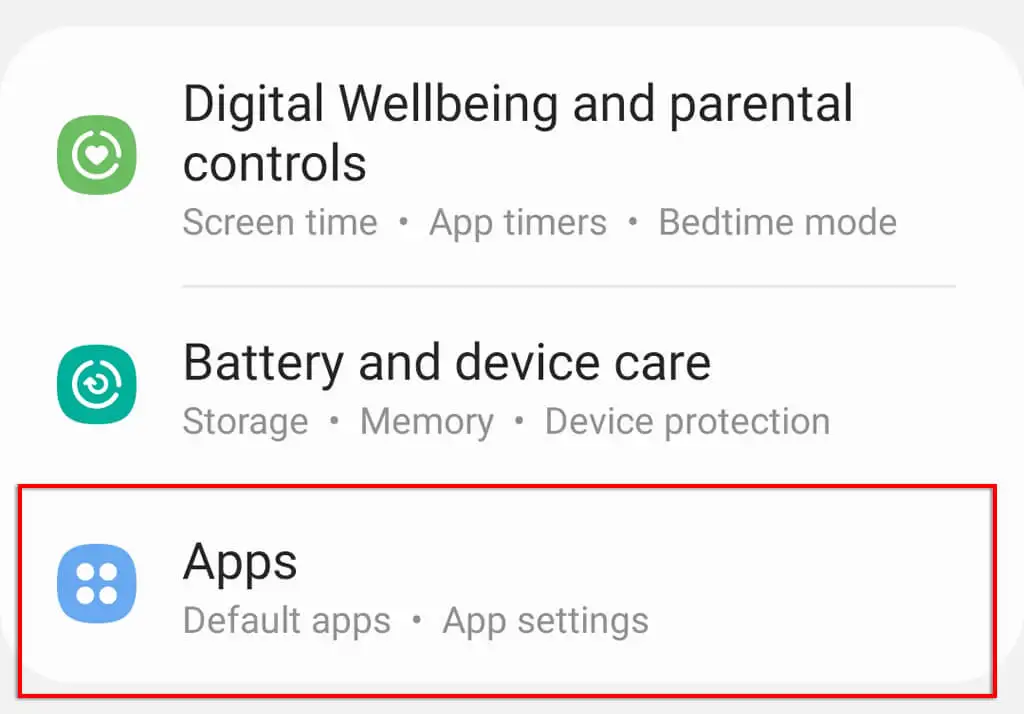
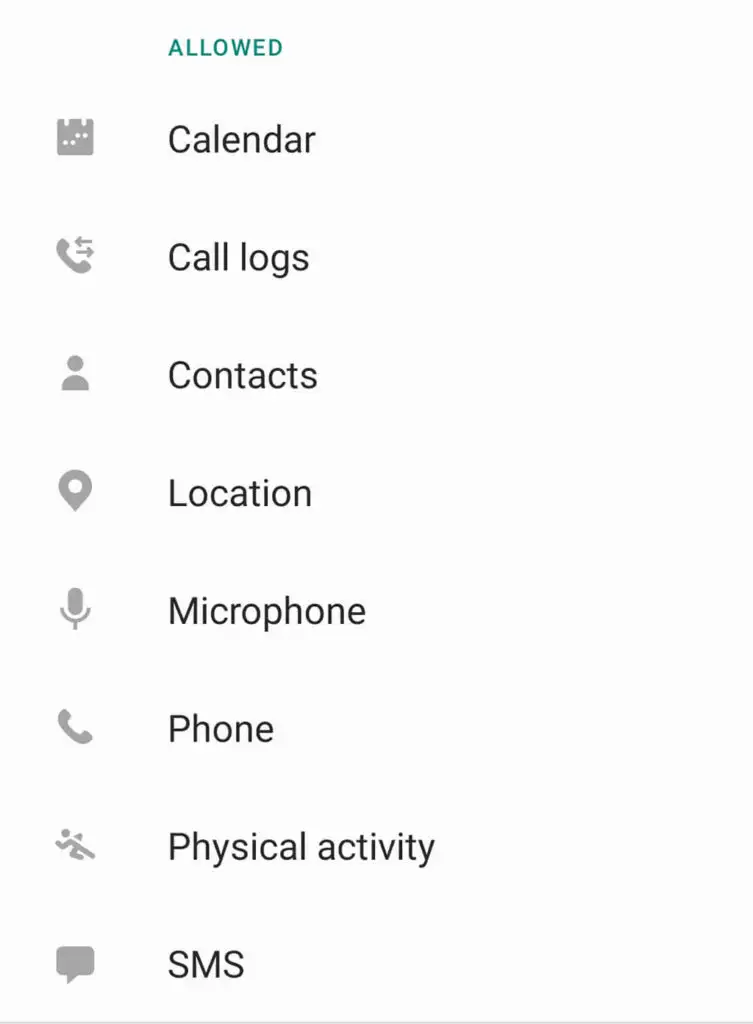
7. 권한 확인
올바르게 작동하려면 Google 어시스턴트가 기기 설정에서 여러 권한을 부여받아야 합니다. Google 어시스턴트에 올바른 권한이 부여되었는지 확인하려면 다음 단계를 따르세요.
- 설정 을 엽니다.
- 앱 을 탭합니다.
- 아래로 스크롤하여 Google 을 탭합니다.

- 권한 을 탭합니다.

- 모든 권한을 토글합니다.
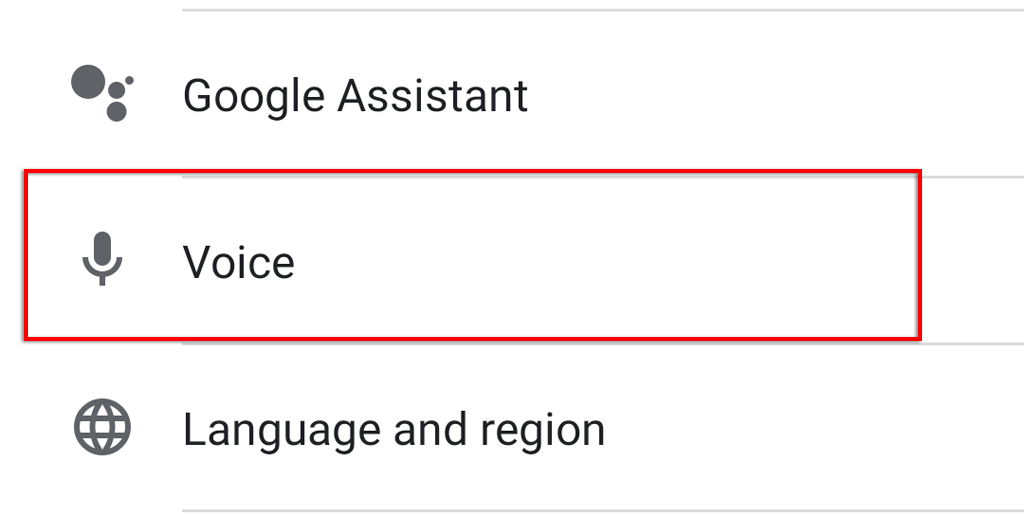
8. 언어 설정 확인
위에서 언급했듯이 Google 어시스턴트 앱은 특정 언어에서만 작동합니다. 사용 가능한 언어는 Google 지원 페이지에서 찾을 수 있습니다.
Google 어시스턴트 설정에서 현재 언어를 확인하려면 다음 단계를 따르세요.
- Google 앱을 엽니다.
- Google Apps 설정을 선택합니다.

- 검색, 어시스턴트 및 음성을 탭합니다.

- 음성 을 탭합니다.
- 언어 를 선택합니다.
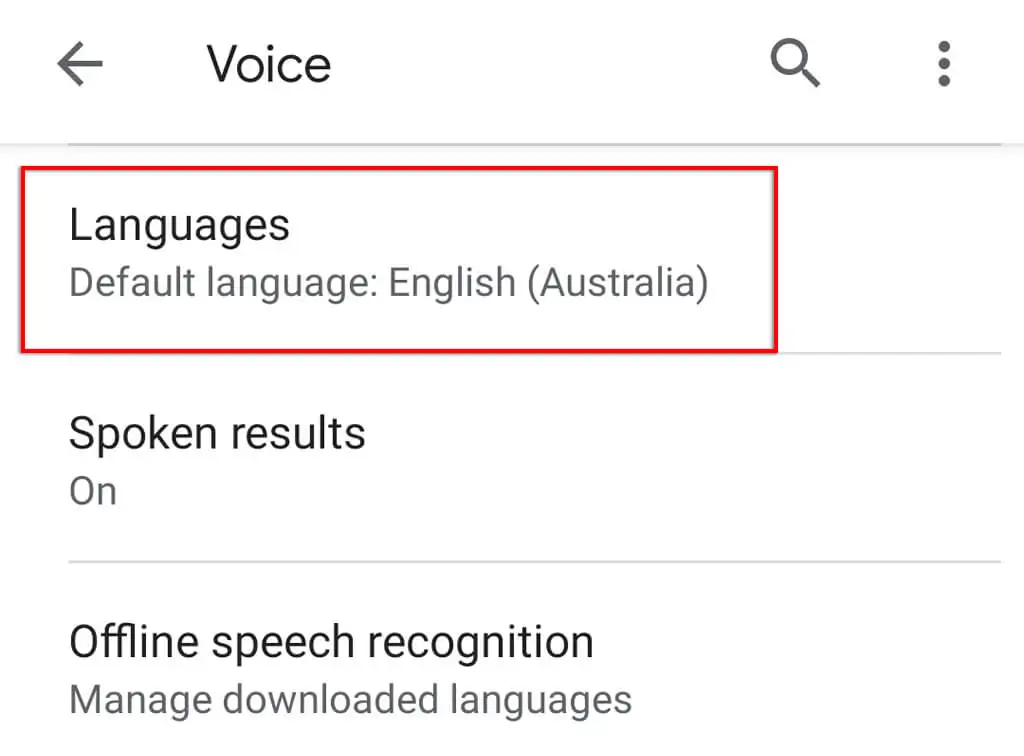
- 사용하려는 언어를 선택하고 저장 을 탭합니다.
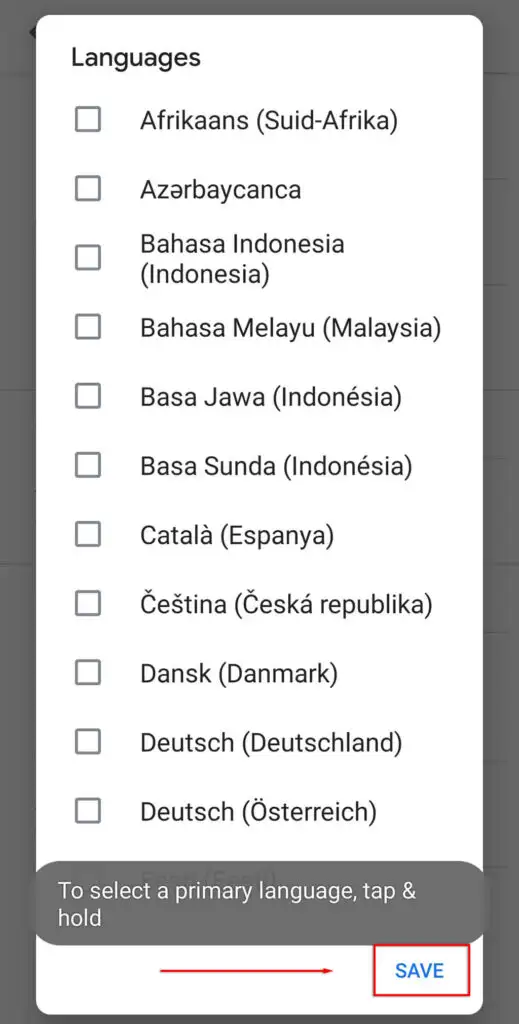
참고: 현재 Google의 영어 지원은 다른 언어 옵션보다 훨씬 더 기능적입니다. 따라서 다른 언어를 사용하는 경우 Google 어시스턴트 음성 인식이 불만족스러울 수 있음을 유의하시기 바랍니다.
9. 업데이트 확인
최신 버전의 Google 어시스턴트(또는 이를 사용하는 앱)를 사용하지 않는 경우 어시스턴트가 더 이상 작동하지 않는 호환성 문제가 발생할 수 있습니다.
Google 앱 업데이트가 있는지 확인하려면 다음 단계를 따르세요.

- Google Play 스토어 를 엽니다.
- 구글 앱을 검색합니다.
- 제거가 아닌 업데이트 옵션이 있는지 확인하십시오. 있는 경우 업데이트 를 누르고 프로세스가 완료될 때까지 기다립니다.
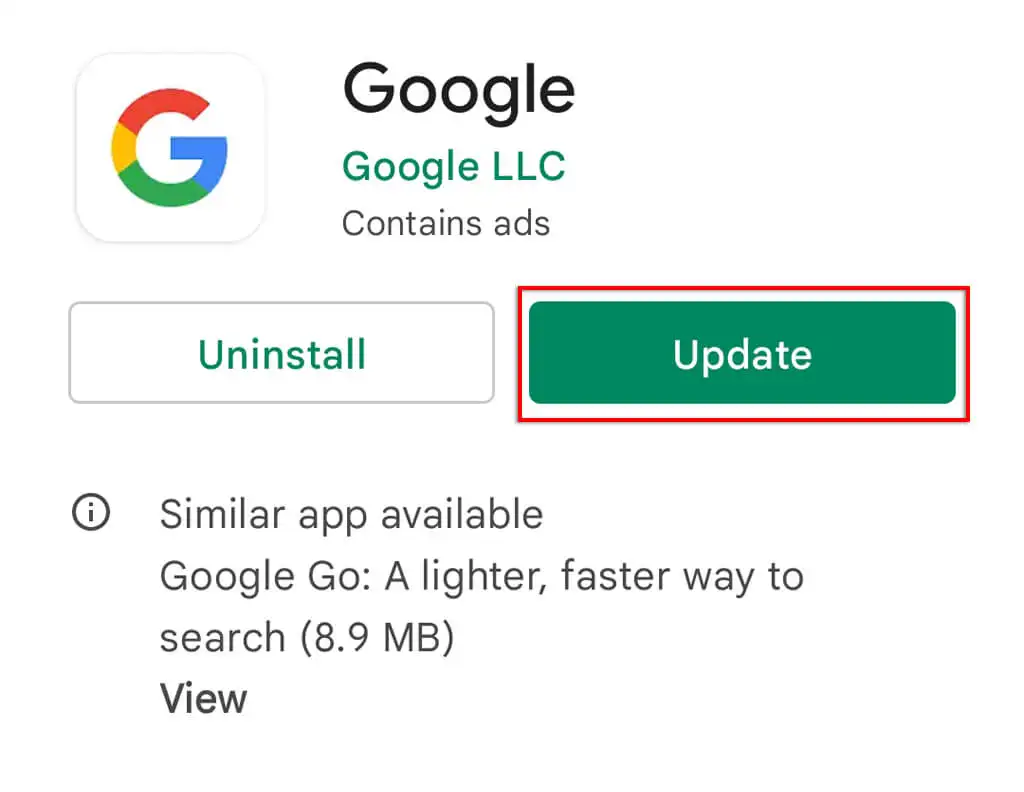
- Google 어시스턴트 로 이 과정을 반복합니다.
Google Nest를 사용하는 경우 어시스턴트 기기는 Google Home 앱을 통해 업데이트되므로 이 프로세스도 따라야 합니다.
참고: 설정 > 시스템 > 시스템 업데이트 > 업데이트 확인 으로 이동하여 장치에 대한 업데이트도 확인하는 것이 좋습니다. 이는 호환성 문제를 해결할 수 있을 뿐만 아니라 온라인에서 데이터를 보호하는 데 중요한 보안 업데이트를 제공합니다.
10. 다른 음성 도우미 제거
삼성의 빅스비(Bixby)나 아마존의 알렉사(Alexa)를 포함한 다른 음성 비서는 구글 어시스턴트가 서로 효과적으로 작동하려고 하기 때문에 구글 어시스턴트를 방해할 수 있다.
이 잠재적 간섭을 제거하고 이것이 Google 어시스턴트에 문제를 일으키는지 확인하려면 이러한 다른 어시스턴트를 완전히 비활성화하거나 제거하는 것이 좋습니다.
이렇게 하려면:
- 설정 앱 을 엽니다.
- 앱 을 탭합니다.

- 스크롤하여 다른 음성 도우미를 찾으십시오.
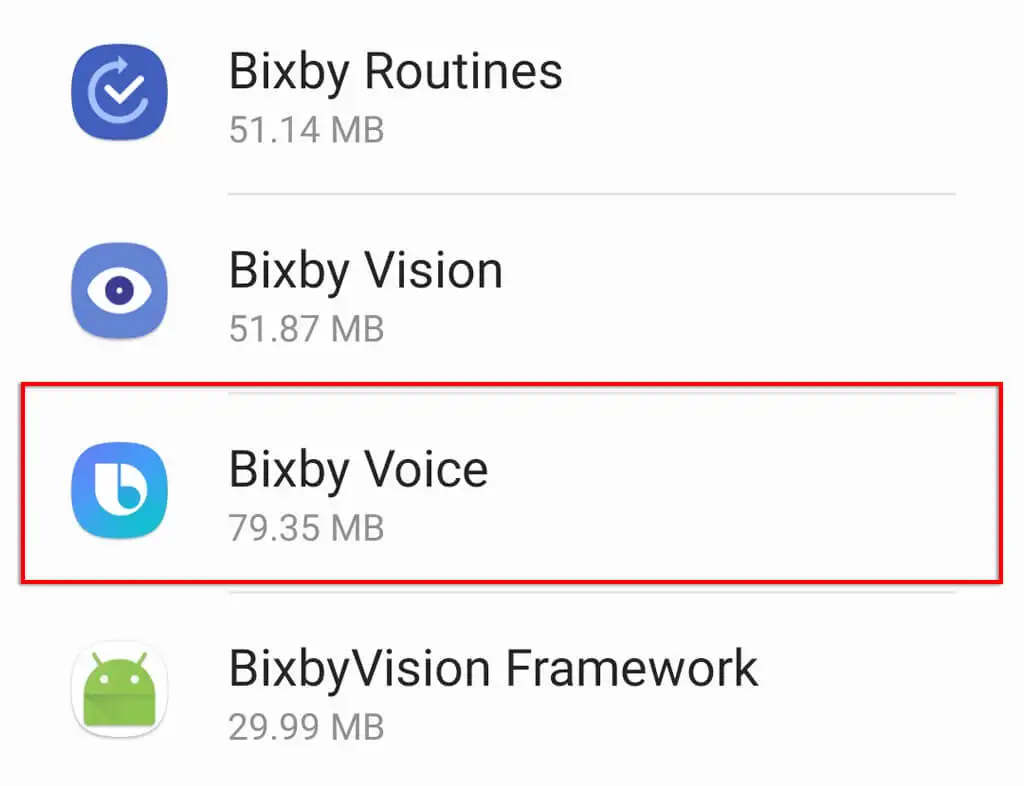
- 비활성화 또는 제거 를 눌러 백그라운드에서 실행되지 않도록 합니다.

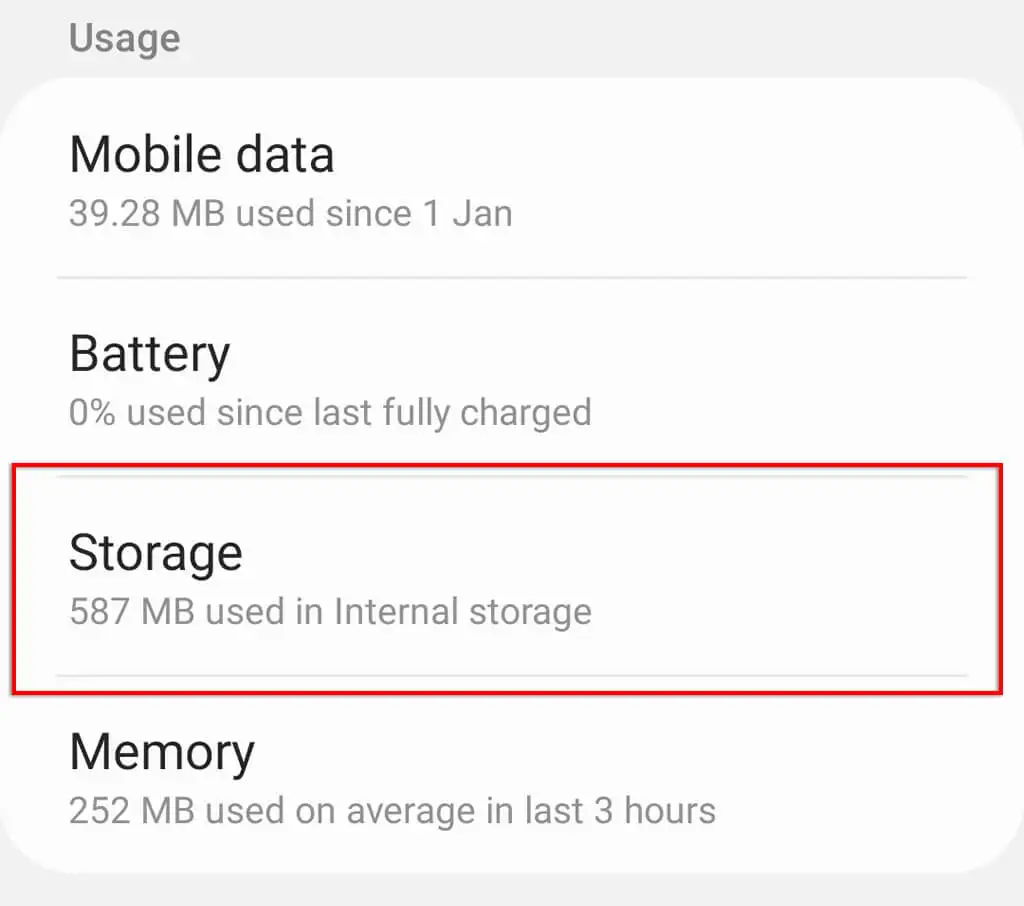
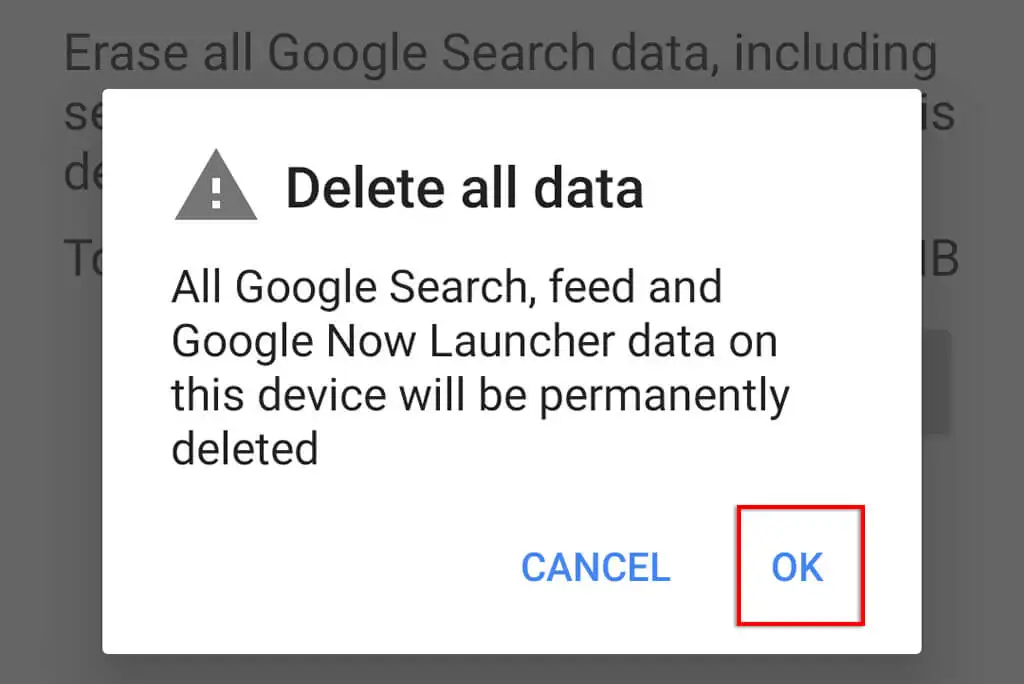
11. Google 어시스턴트 캐시 지우기
많은 소프트웨어 결함이 있는 경우 앱 데이터와 캐시 파일을 지우면 문제가 해결되는 경우가 많습니다. Google 앱 캐시를 지우려면 다음 단계를 따르세요.
- 설정 을 엽니다.
- 앱 을 선택합니다.
- Google 을 탭합니다.
- 저장용량 을 탭합니다.
- 아래로 스크롤하여 캐시 지우기 를 누른 다음 저장소 관리 를 누릅니다.
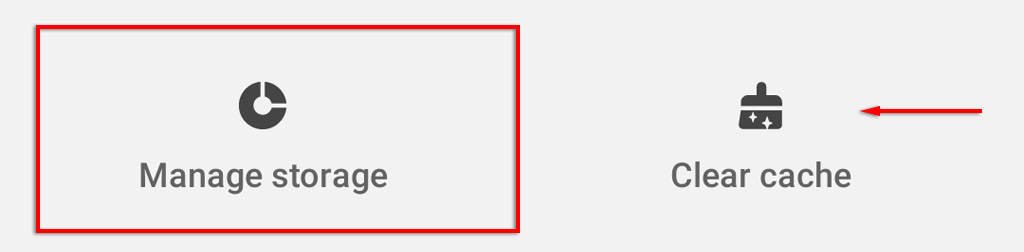
- 모든 데이터 지우기 를 탭합니다.
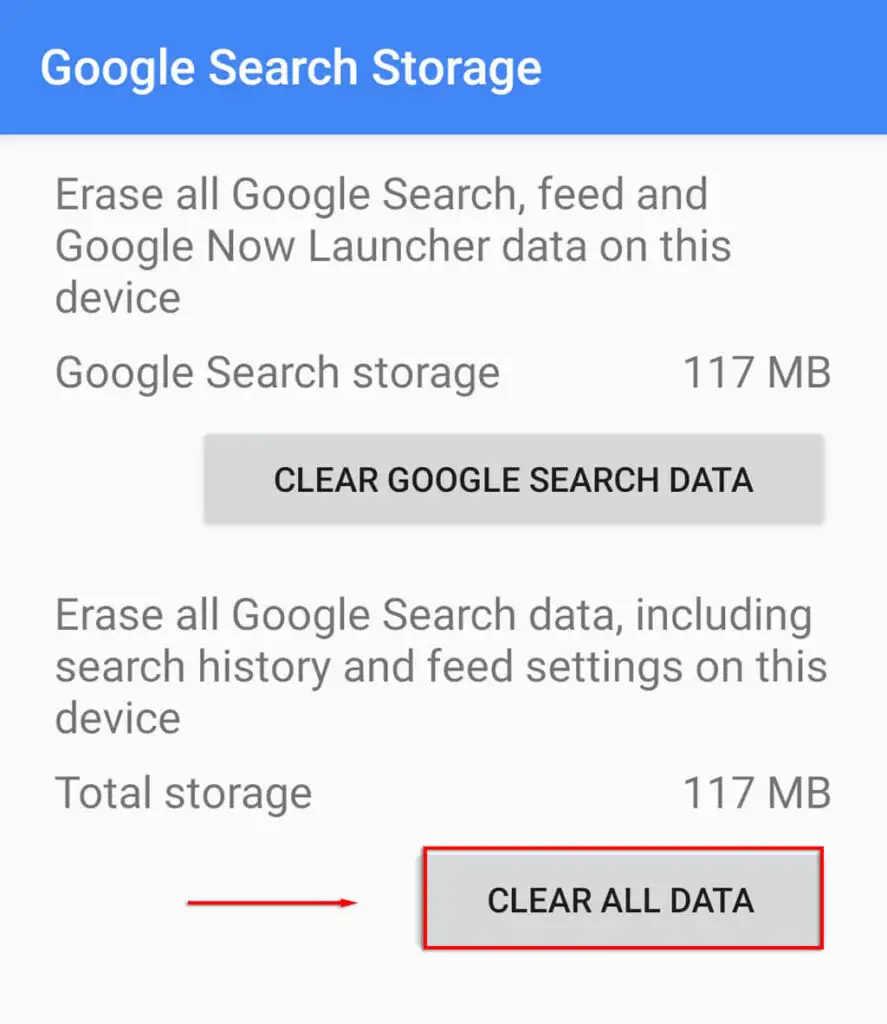
- 확인을 누릅니다 .
12. Google 어시스턴트 음성 모델 재훈련
Google 어시스턴트가 내 음성을 인식하는 데 문제가 있는 경우 음성 모델을 다시 학습하면 문제를 해결할 수 있습니다. Google 어시스턴트가 잠금 화면에서 응답하지 않는 경우 그 이유일 수 있습니다.
Google 어시스턴트 음성 모델을 다시 학습시키려면 다음 단계를 따르세요.
- 설정 을 엽니다.
- Google 을 탭합니다.
- Google Apps 설정을 선택합니다.
- 검색, 어시스턴트 및 음성을 탭합니다.
- 음성 을 탭합니다.
- 보이스 매치 를 탭합니다.
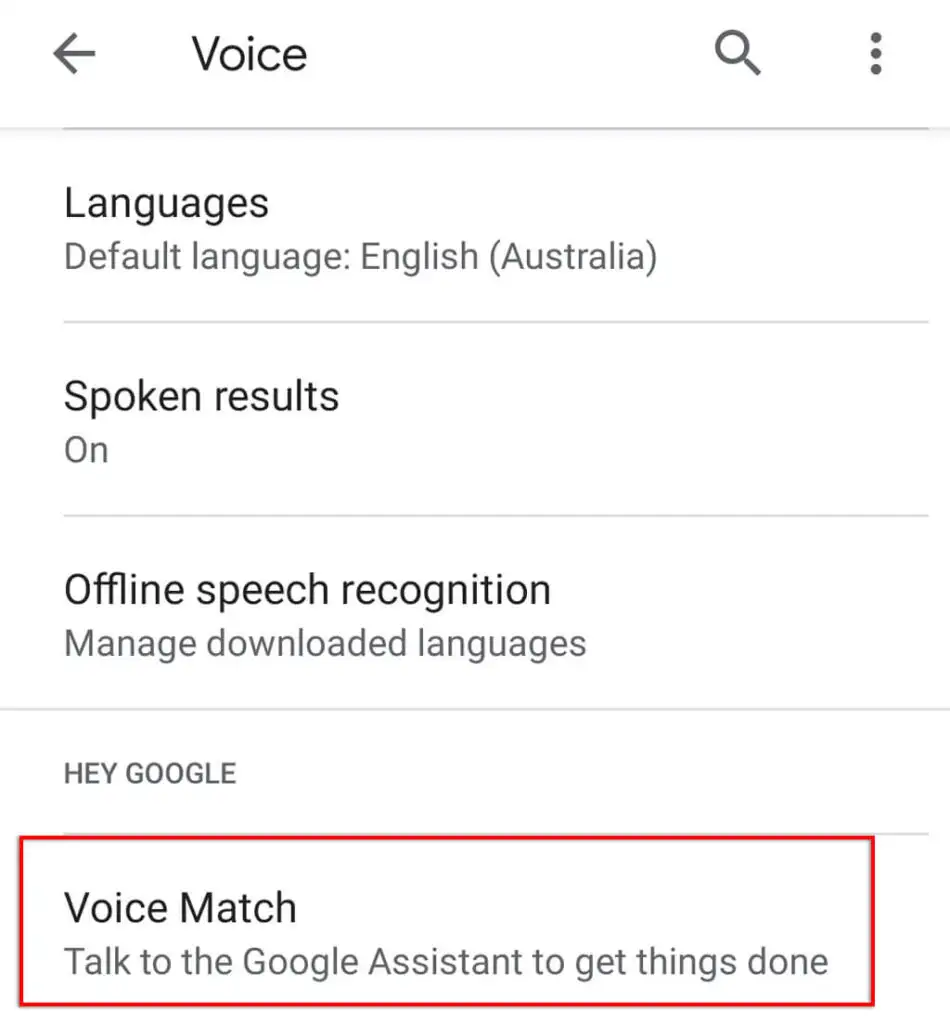
- 아래로 스크롤하여 음성 모델 을 탭합니다.
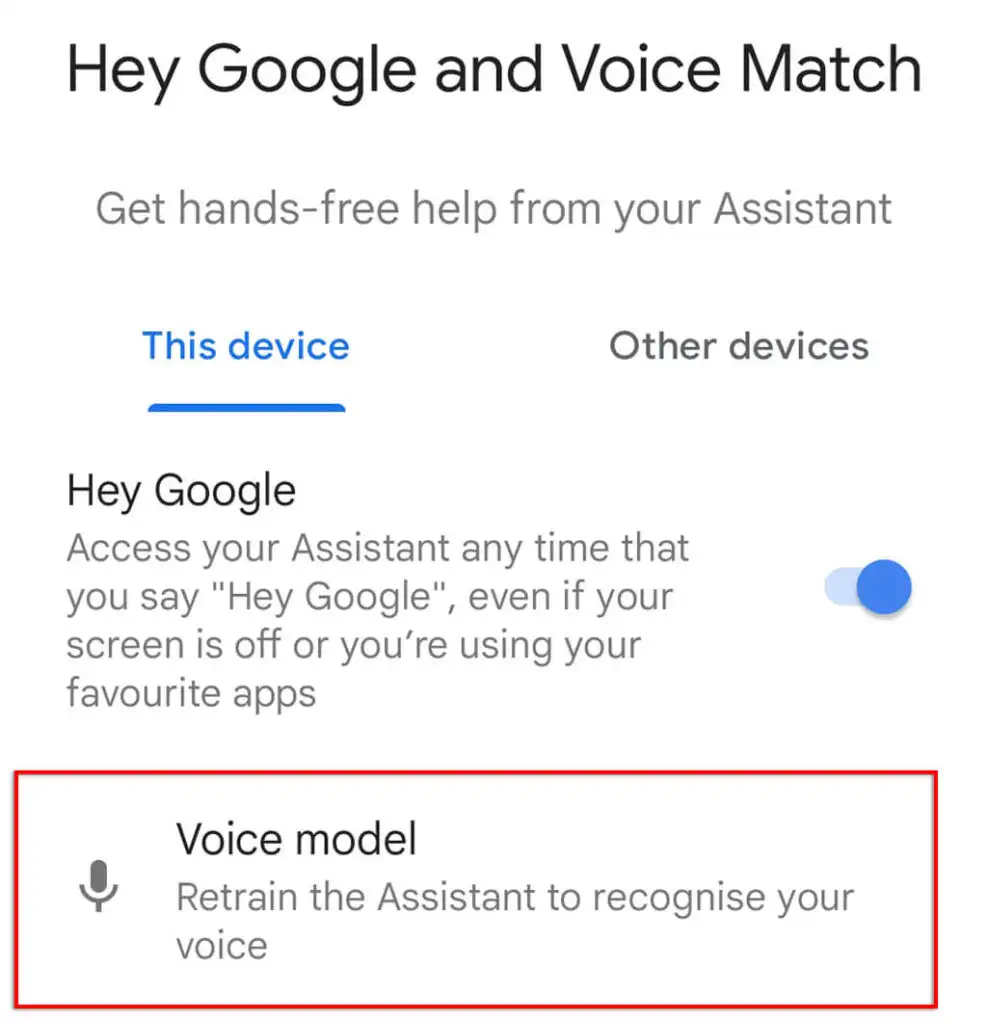
- 음성 모델 재학습 을 선택합니다.
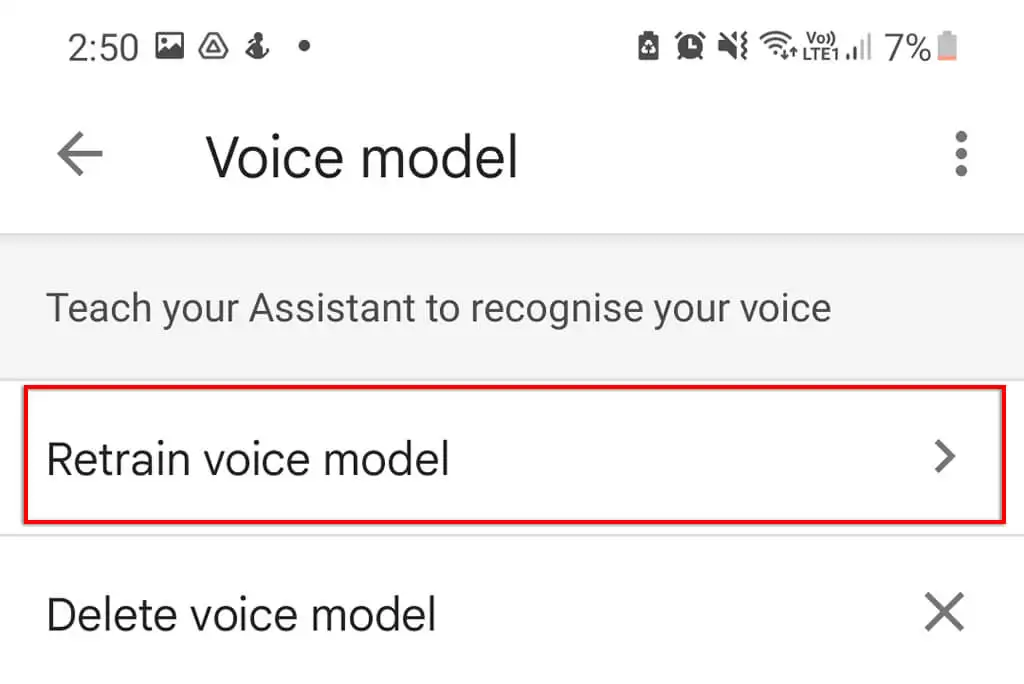
- 앱이 특정 단어를 말하도록 요청할 것입니다. 완료될 때까지 프로세스를 진행한 다음 평소와 같이 Google 어시스턴트를 사용해 보세요.

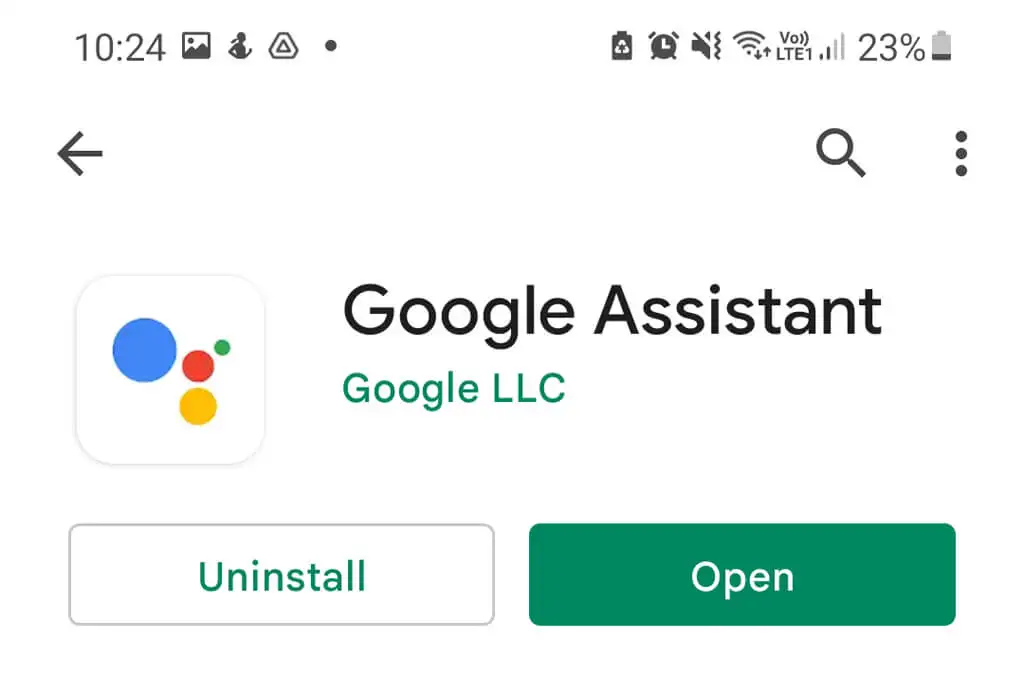
13. Google Apps 제거 및 재설치
다른 방법이 효과가 없다면 최후의 수단은 어시스턴트가 작동하지 않을 가능성이 있는 Google 앱을 다시 설치하는 것입니다.
Google 앱을 제거하고 다시 설치하려면 다음 단계를 따르세요.
- Google Play 스토어 를 엽니다.
- Google 어시스턴트 를 검색하고 앱을 선택합니다.
- 창의 오른쪽 상단에서 제거 를 누릅니다.
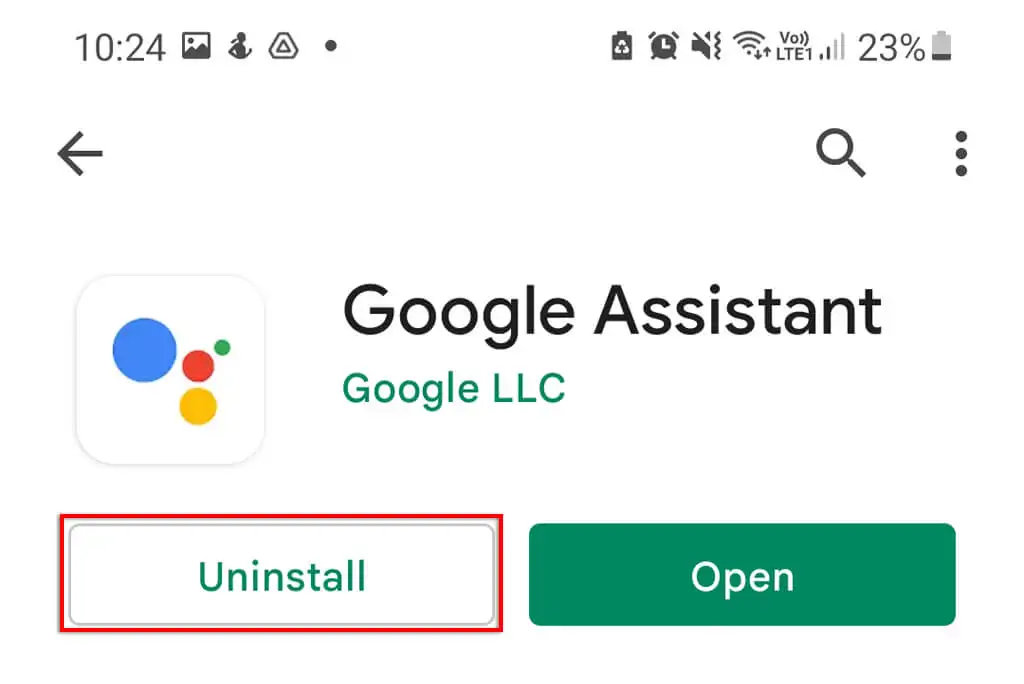
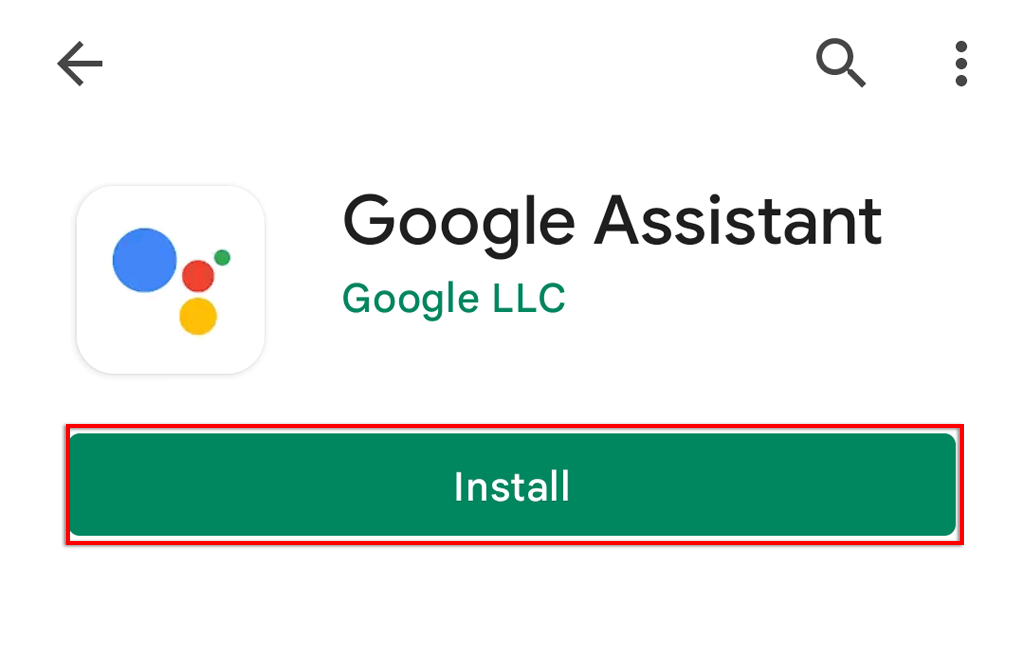
- Google 어시스턴트 에 대해 이 작업을 반복한 다음 "Hey Google" 기능을 사용해 보세요.
OK Google, 행복한 음악 재생
AI 개인 비서가 주변에 있으면 쉽게 익숙해질 수 있지만 작동을 멈춘 후에야 얼마나 사용하고 있는지 알 수 있습니다. 다행히도 일반적으로 Google 어시스턴트를 수정하는 것은 쉽습니다. 이 문서가 어시스턴트 문제를 해결하고 다시 한 번 핸즈프리 음성 명령을 사용할 수 있기를 바랍니다.